Replace favicon.ico for all devices on Bitrix
First, we need to figure out what this icon is? Favicon is a website icon that is displayed next to the address bar, next to the title on the tab or in the list of browser bookmarks. Traditionally, an image of 16x16 pixels in ICO format is used, which is often placed in the root of the site with the name favicon.ico.
Everything would be simple, but it turns out that not only the browser uses these icons. They can be used on the smartphone desktop, for example, or in the list of bookmarks on Windows. In this case, you must agree that the 16x16 size of the Bitrix website icon on the iPhone desktop will not look very aesthetically pleasing. In this case, we will need a special set of icons. And adding a file to the root of the site will not be enough. A special connection will be required.
Generating icons for Bitrix
The first step is to draw an icon in Photoshop or use some online service to generate it. Personally, I drew it in Photoshop. The picture should be exactly square. Preferably 512 by 512 pixels minimum. Once drawn, save it in png format. If the icon fills the entire square, that's good, but I ran into a problem with a round picture with transparent corners. To prepare the picture for the next step, I ran it through the favicon.io service, converting it from png to ico while preserving the transparency of the corners. 
And now the juiciest part. We run the prepared icon through the favicon-generator.org service, which will not only generate all types of icons for different devices, but also give us the code for connecting icons on the site for Bitrix! 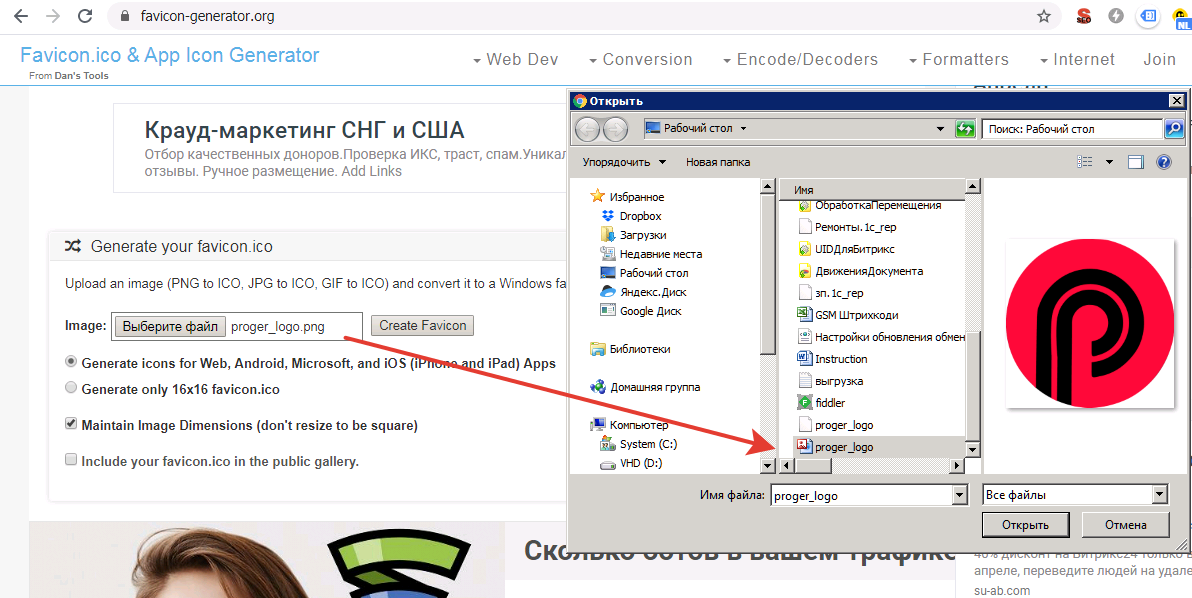

Uploading icons to the site
First, we need to upload the downloaded archive with the icon set to the site. Find the folder of our site template and create another favicon folder in it. The site template directory can be either in /bitrix/templates/
Connecting a set of icons
We just need to connect all the icons in our website template. To do this, we just need to enter the necessary records that the generation service gave us. Copy the text from the service and paste it into the header of our website template in the header.php file between the
tags. Almost done. We also just need to change the addresses of our icons in the line where they connect. Since we did not unzip them in the root folder of the website, in order not to make a mess there, we will point to the folder where they are located. To do this, we will need to add the following line in each href attribute /favicon. So that it turns out not href="/favicon-16x16.png" , but like this: href="/favicon/favicon-16x16.png". SITE_TEMPLATE_PATH is a const that indicates the location of the folder of our website template, wherever it is.Done! Now we just need to save the header.php file and restart the browser, not forgetting to clear the browser cache first. Now not only do we have a beautiful icon in the browser tab, but we can also save a link to our site as a beautiful icon, for example on an iPhone.


15 April 2020 (Boudybuilder) Виталий Фантич
Related Information:
- Telegram chat Bitrix Proger Union
- Nova Post delivery service for Bitrix: Module from Proger for efficient delivery in your store
- Multilingual Bitrix
- Module Market for Bitrix
- Multilingual Bitrix | Translator
- Beautiful animation on Bitrix
- Converting img image to amp-img Bitrix
- AMP Bitrix - Accelerated Mobile Pages Project Bitrix